
Update a client

Edit client records and update client details from the Info Sheet, Client Settings, and inline controls on the Clients list. In AgencyTitan, Client Profile means the template that defines fields and layout, not the client’s display name or logo.
Who this is for
Section titled “Who this is for”Agency team members who maintain existing client records. Requires the Edit Clients permission. Without it, edit controls and Client Settings are not available.
Before you begin
Section titled “Before you begin”- The client record already exists. See Create a client if you need to add one.
- You are signed in to the correct agency workspace.
- You can open the client from Clients ( /clients (opens in new tab) ). See Find and organize clients for search and filters.
New to client vocabulary? See Clients overview.
Update Info Sheet fields
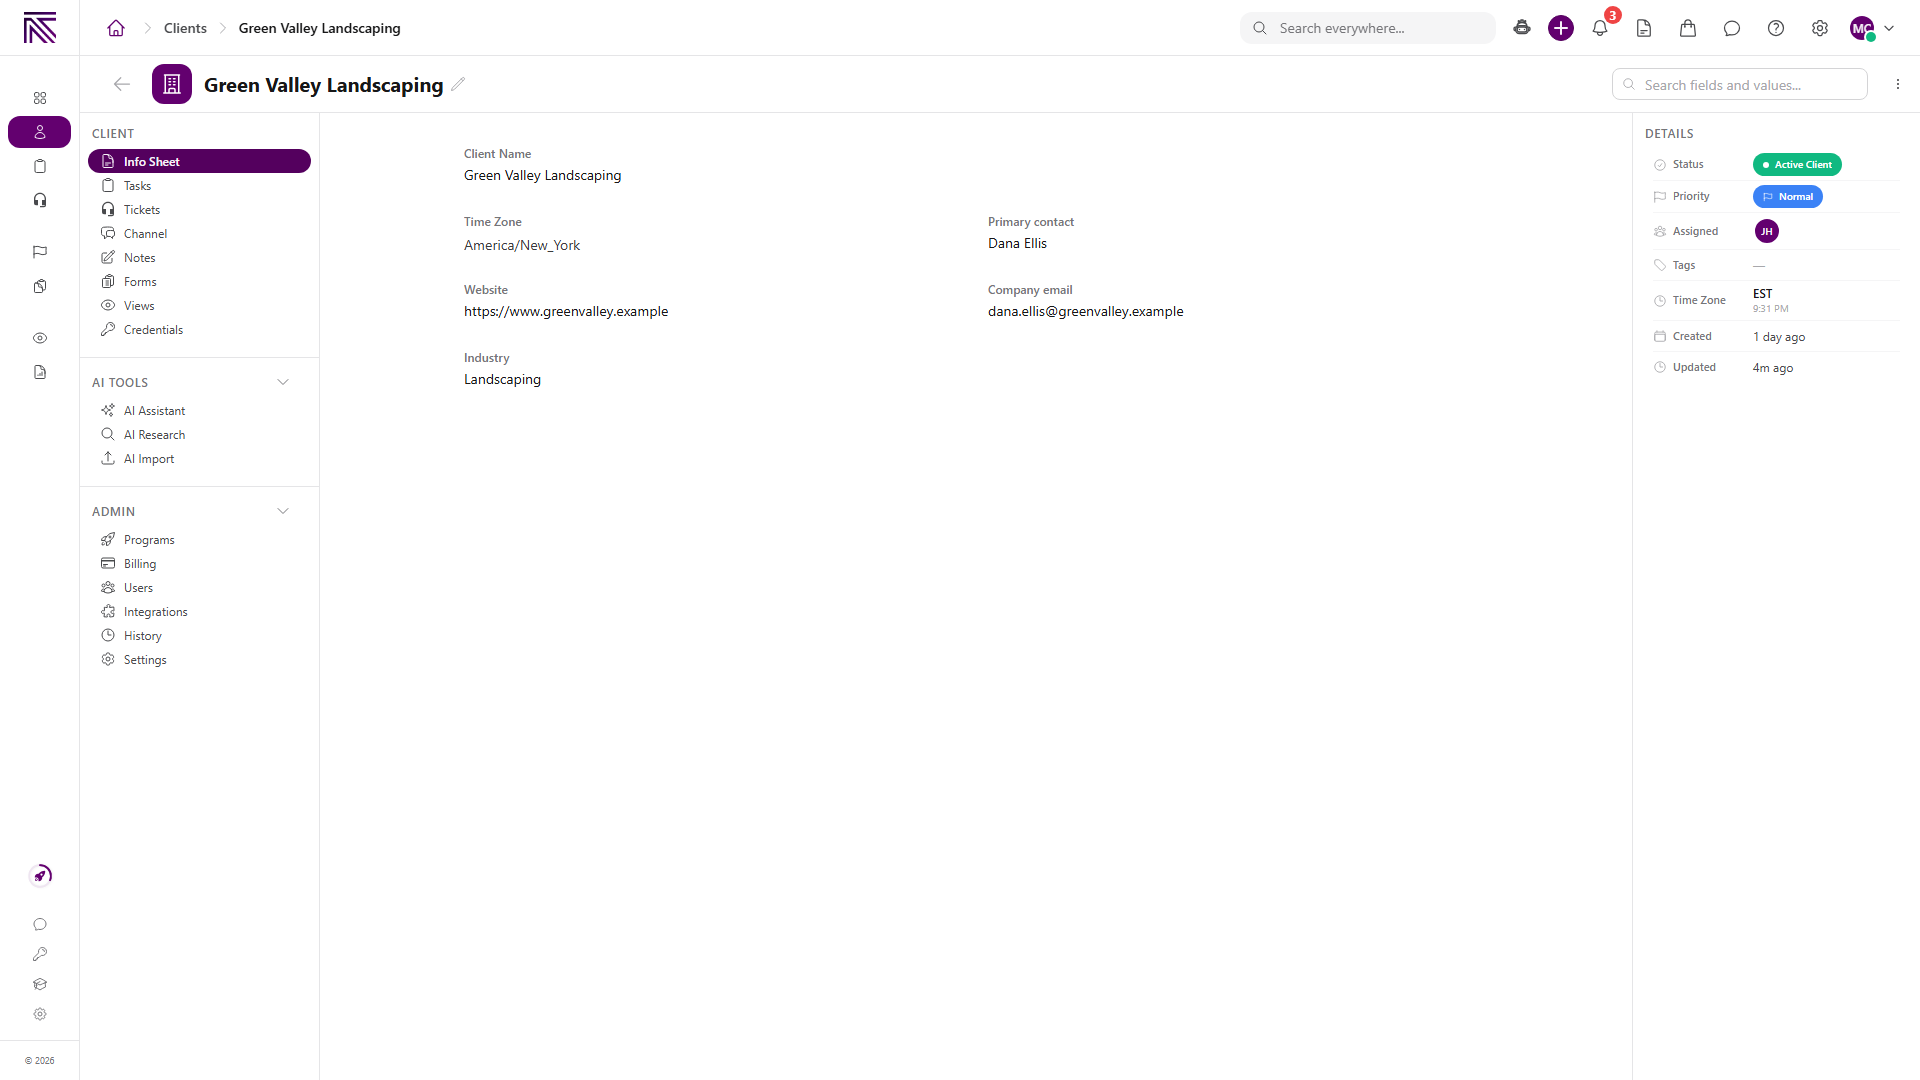
Section titled “Update Info Sheet fields”Day-to-day client data lives on the Info Sheet for each client record.
-
Open Clients and select a client name to open its record.
-
Confirm Info Sheet is selected under CLIENT DETAILS.
-
Hover a field value to reveal inline actions:
- Edit value
- Copy value
- View field history
-
Select Edit value to change the field, then save your edit.
View full size
Use Copy value when you need the field text elsewhere. Use View field history to see prior values for that field.
For a Simple List field, enter items as usual, then reorder them by dragging an item’s grip handle. You can also hover or focus an item and select Move left or Move right (or Move up and Move down for a vertical list). The chosen order is saved with the client record when the field edit is saved.
Update core client settings
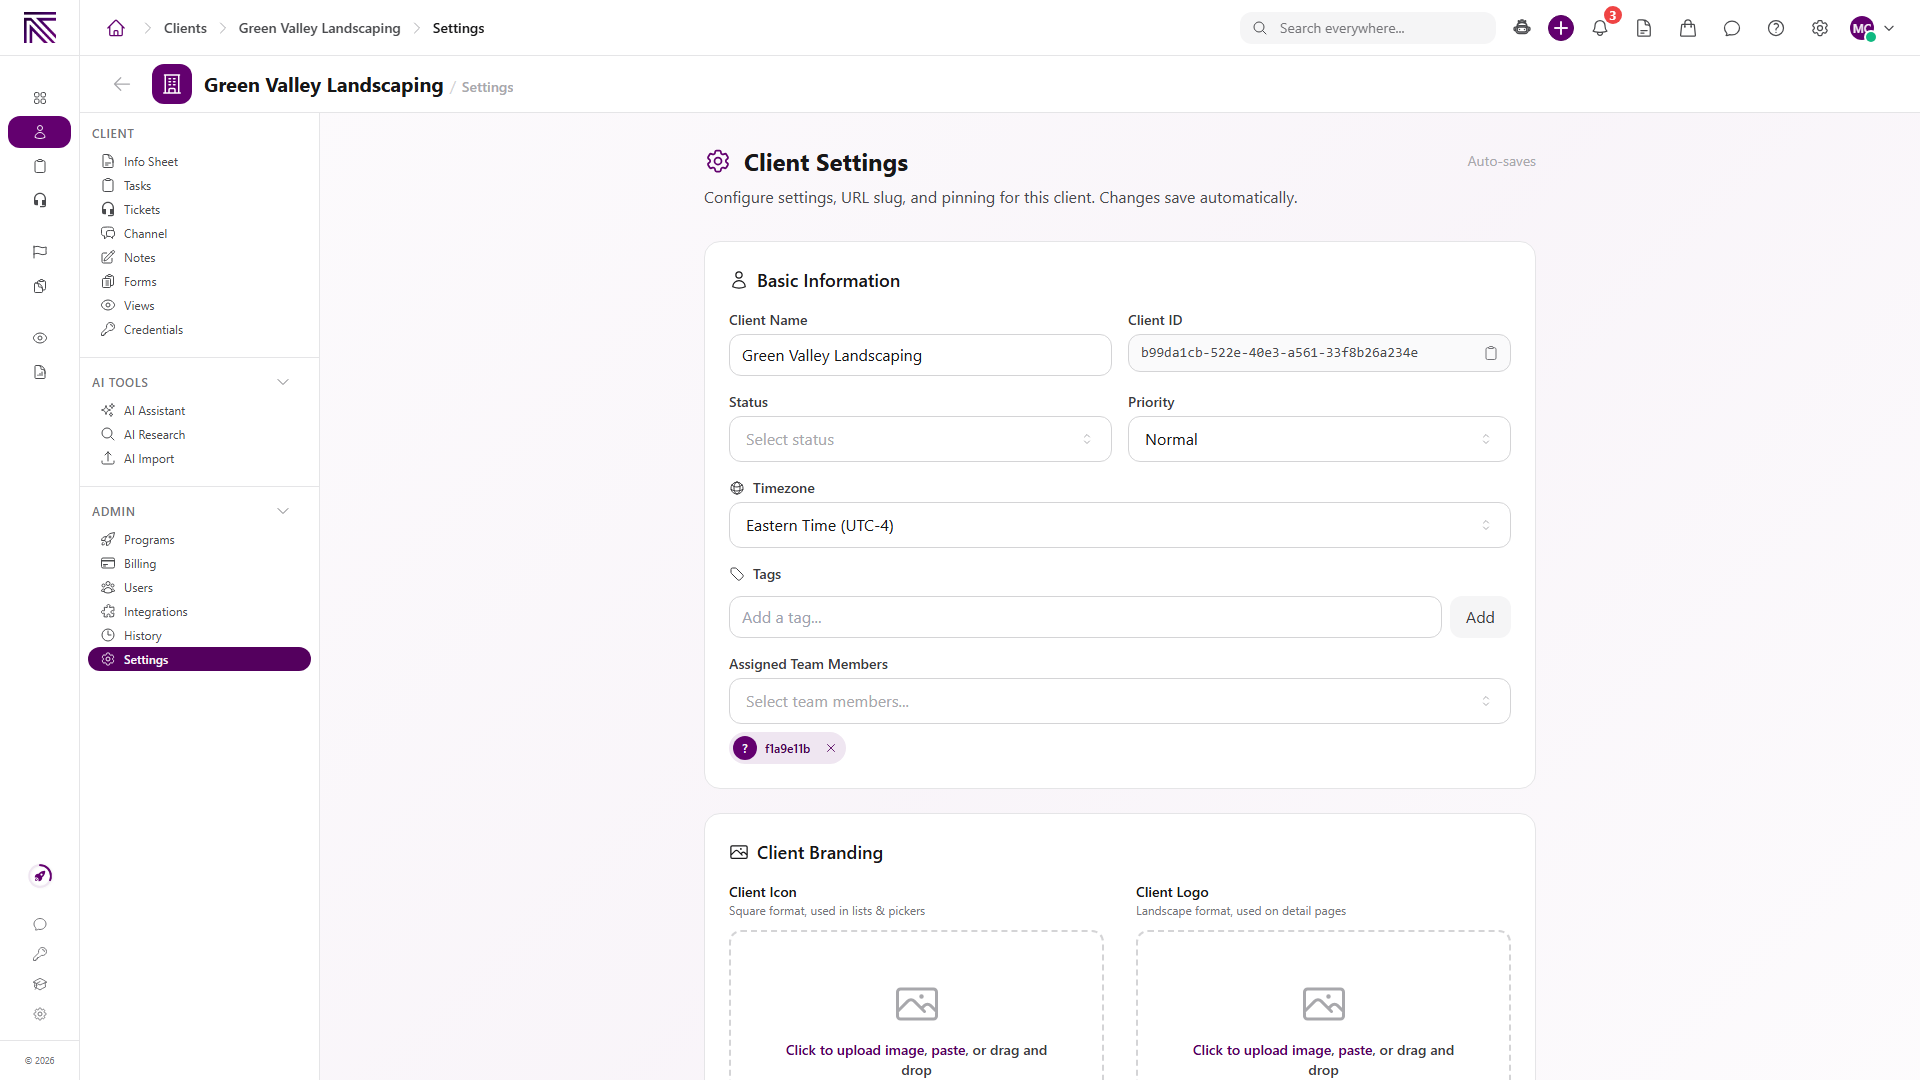
Section titled “Update core client settings”Core account fields (name, status, priority, timezone, tags, and team assignment) live on Client Settings.
- From the client record, select Settings in the client navigation.
- Review Client Settings. The page copy says Changes save automatically; an Auto-saves label appears on the page.
- Update fields in Basic Information as needed:
- Client Name
- Client ID (read-only; use Copy Client ID when you need it)
- Status
- Priority
- Timezone
- Tags (type in the field and select Add)
- Assigned Team Members
Changes save automatically as you edit. No separate Save button is required.
Update client branding
Section titled “Update client branding”On Client Settings, scroll to Client Branding:
- Client Icon: square format, used in lists and pickers
- Client Logo: landscape format, used on detail pages
For either image, Click to upload image, paste, or drag and drop. Accepted formats: PNG, JPG, GIF, WEBP up to 25 MB.
Update URL slug and pinning
Section titled “Update URL slug and pinning”Still on Client Settings:
-
Under URL Slug, edit Pretty URL Slug (shown with the
/clients/prefix). Helper text: Used for friendly URLs. Auto-generated from client name if left empty. -
Under Pinning, choose:
- Pin for Me: Only visible to you
- Pin for Everyone: Visible to all team members
View full size
For list-level pinning, see Find and organize clients.
Change status, priority, tags, and profile from the list
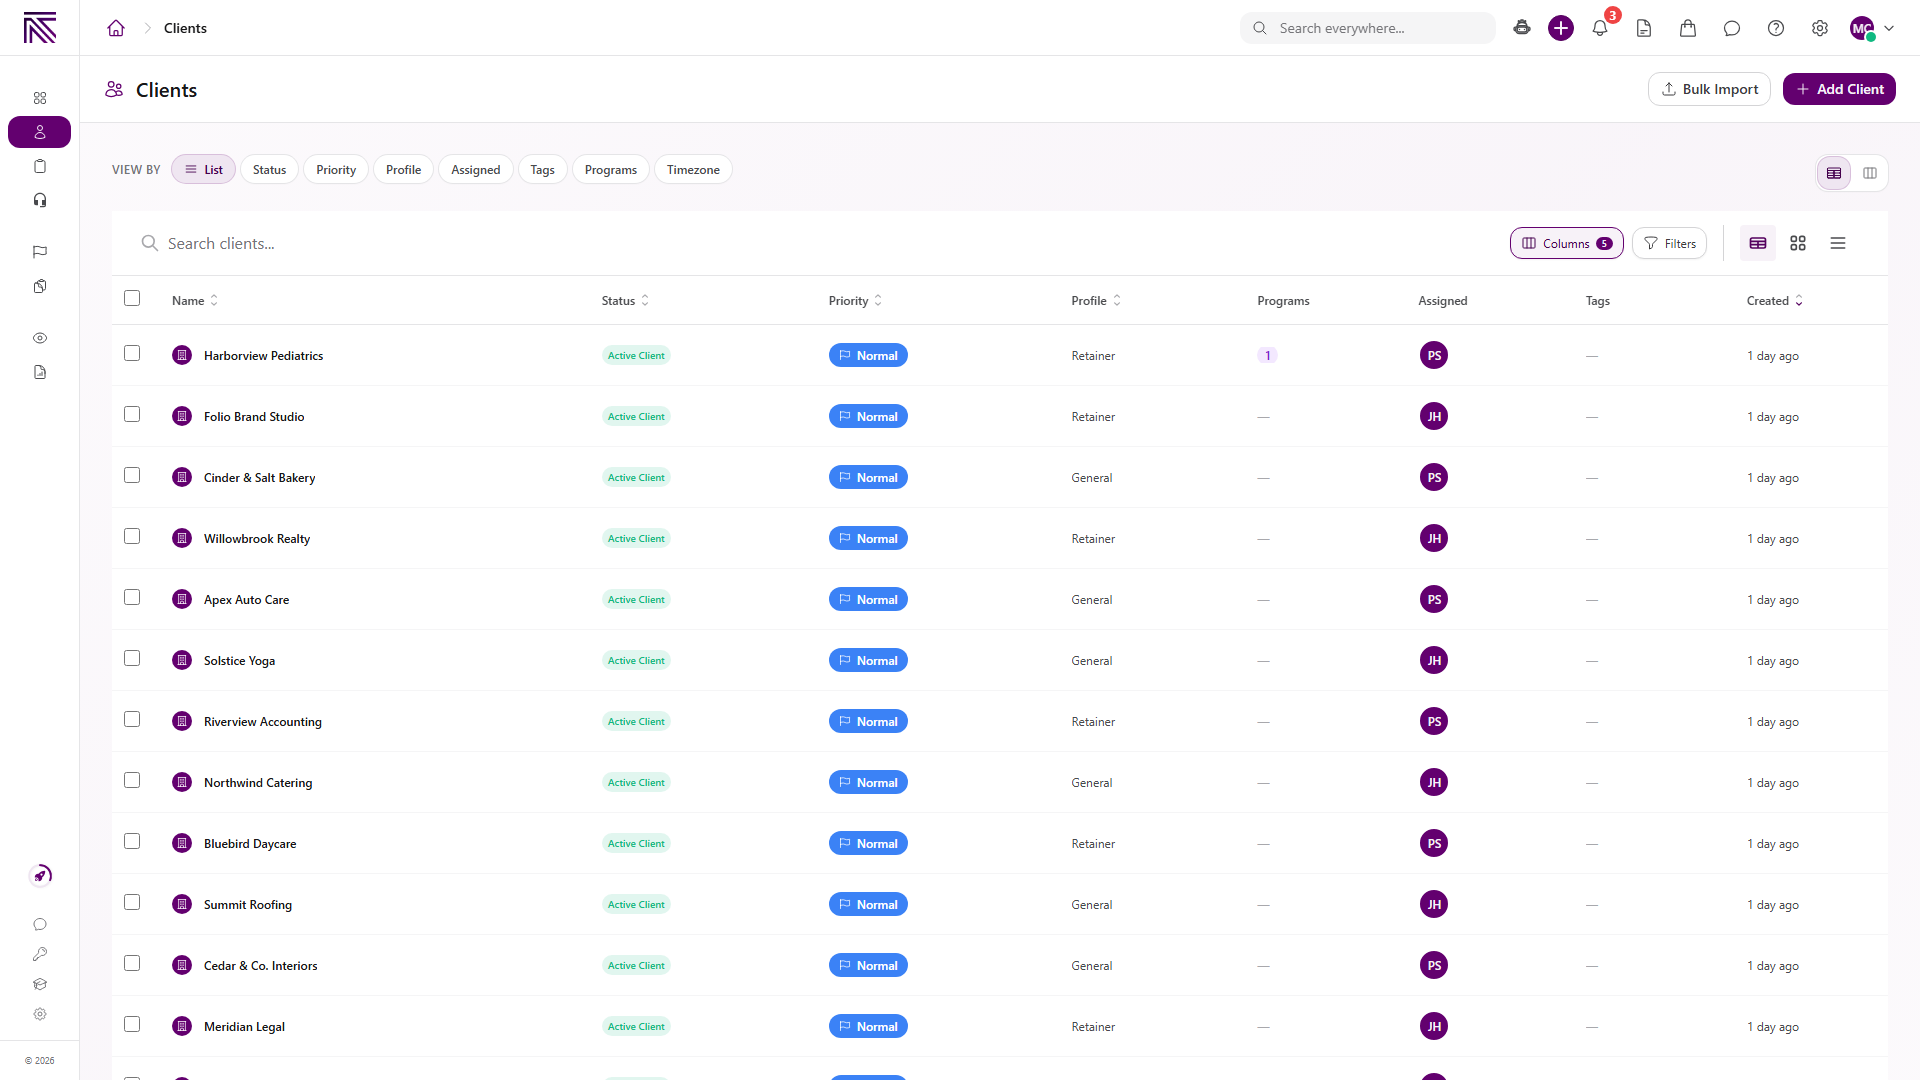
Section titled “Change status, priority, tags, and profile from the list”On the Clients list, several columns support inline updates without opening the full record:
-
Status: change status
-
Priority: change priority
-
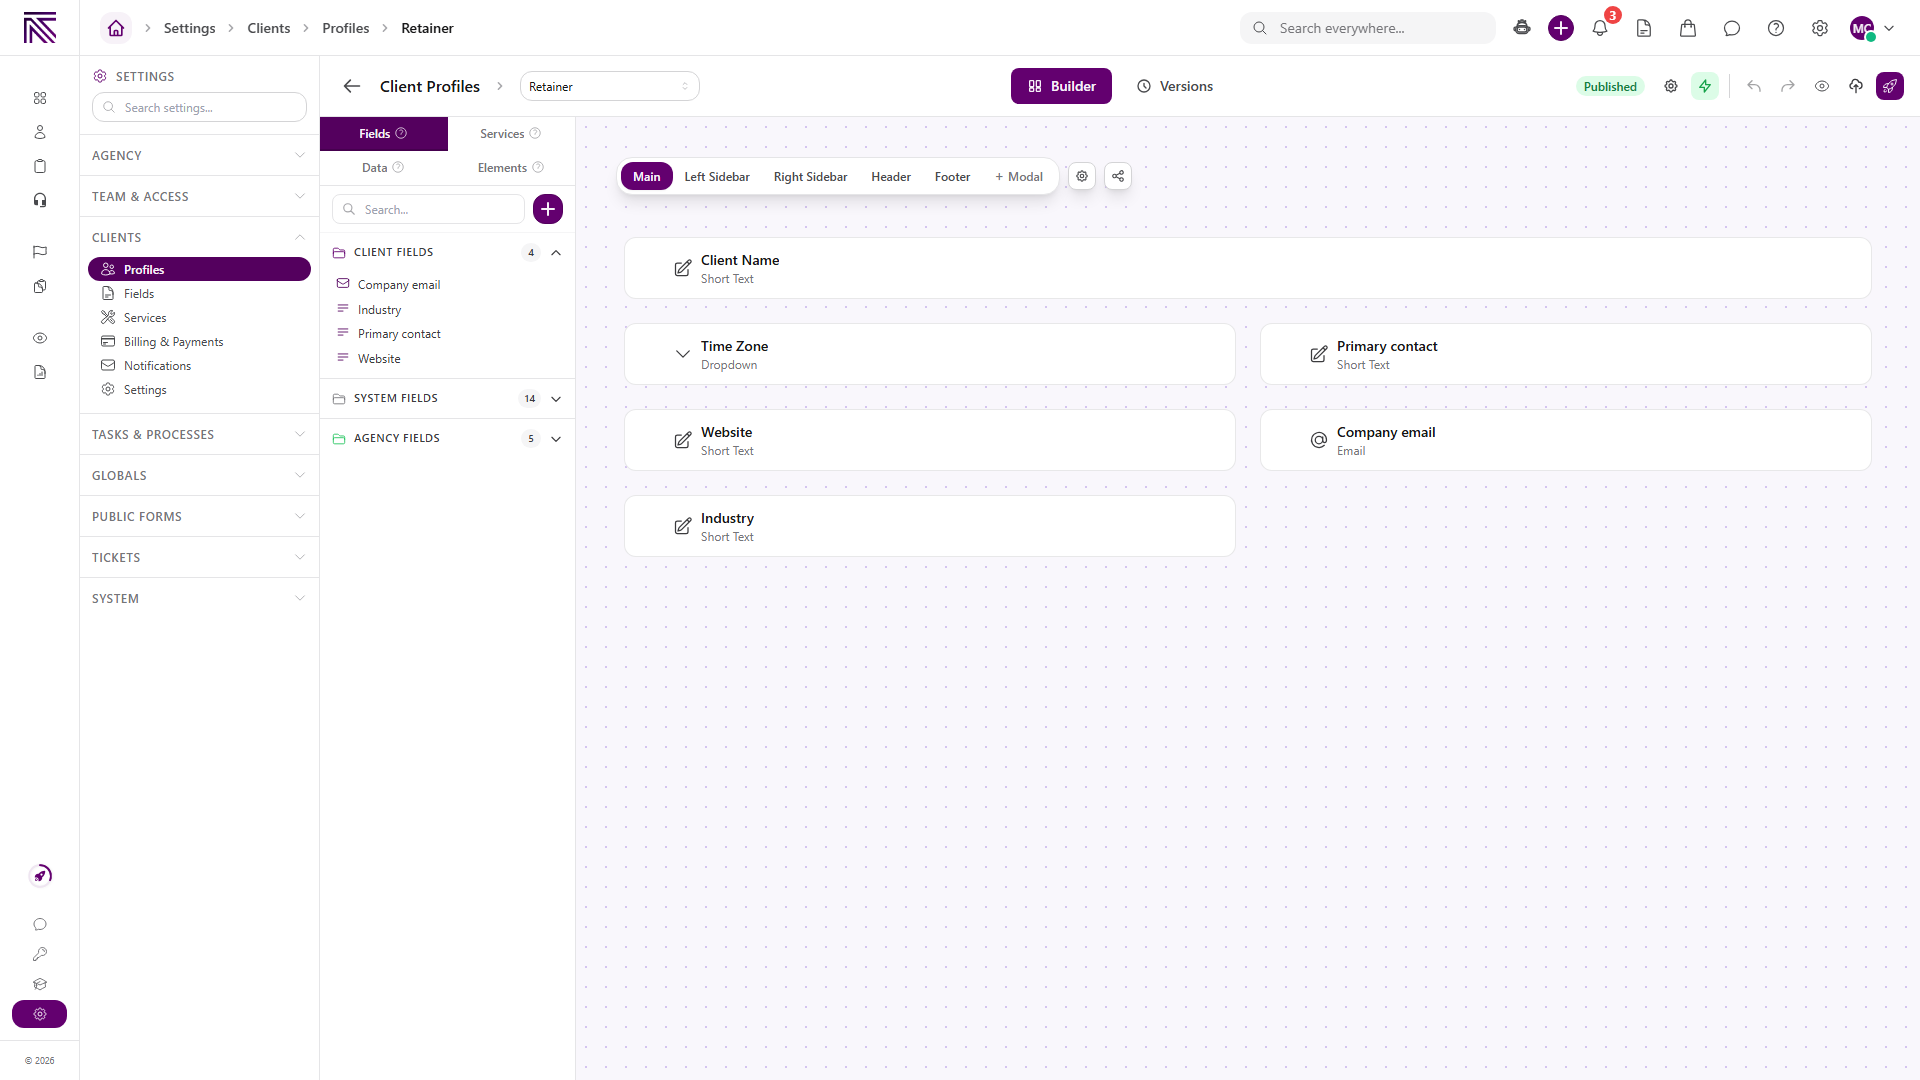
Profile: change profile (reassign the Client Profile template)
-
Tags: edit tags
-
Assigned: edit assignment
View full size
Select the value in the column you want to change and pick a new option from the control that opens.
Change Client Profile (reassign template)
Section titled “Change Client Profile (reassign template)”Reassign profile from the Clients list
Section titled “Reassign profile from the Clients list”-
Open Clients ( /clients (opens in new tab) ).
-
In the Profile column for the client, open the profile control (Change profile).
-
Search or scroll the list and select the target profile.
View full size
The change applies immediately; there is no confirmation step. The Profile column updates to the profile you selected.
Requirements and consequences:
- Requires Edit Clients
- The target Client Profile must be active and available in your agency workspace
- Stored field values on the client record remain
- Info Sheet layout and available Status options come from the new template
- The client’s current Status is not automatically reset; review Status after changing profile
Edit Profile opens the template builder
Section titled “Edit Profile opens the template builder”Edit Profile in the client header More actions menu (⋯) opens the Client Profile template builder for the profile assigned to this client. It does not reassign the client to a different profile.
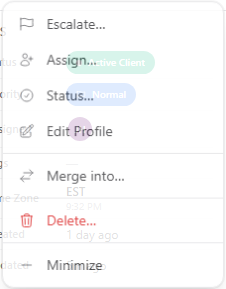
To change client profile (reassign template), use Change profile on the Clients list as described above, not Edit Profile.
Expected result
Section titled “Expected result”- Info Sheet field edits stay on the client record.
- Client Settings changes save automatically (Auto-saves).
- Client Icon, Client Logo, Pretty URL Slug, and pin choices update as configured.
- Inline list changes update Status, Priority, Profile, Tags, or assignment display immediately.
- After a profile reassignment, the client uses the new template’s layout and status options; field values are retained.
Troubleshooting
Section titled “Troubleshooting”| Symptom | Likely cause | What to do |
|---|---|---|
| Edit value or Client Settings is missing | You lack Edit Clients | Ask a workspace owner to grant Edit Clients |
| Change profile is unavailable | Missing Edit Clients or the profile column is hidden | Confirm permissions; open Columns on the list and show Profile |
| Target profile is not listed | Profile is inactive or not available in your agency | Choose an active profile in your agency workspace |
| Layout looks wrong after profile change | Expected: the new Client Profile template controls sections and fields | Review Info Sheet and Status after reassignment |
| Edit Profile did not reassign the client | Edit Profile opens the template builder, not reassignment | Use Change profile on the Clients list instead |
| Branding upload fails | File type or size outside limits | Use PNG, JPG, GIF, or WEBP at 25 MB or less |
| Pin for Everyone is missing | Your role may not include team-wide pin controls | Use Pin for Me, or ask a workspace owner to pin for the team |
Related articles
 Concept Clients overview Understand the Clients list, client record anatomy, Client Profile templates, Info Sheets, notes, programs, tasks, and tickets.
  How-to Create a client Add a client record from the Clients list using Client Name, Client Profile, and any agency-required fields.
  How-to Find and organize clients Search and filter clients on the Clients list, customize columns, sort results, pin important accounts, and switch list layouts.
  How-to Invite a client portal user Invite a client contact to the client portal so they can sign in and access this client's workspace. Send a client portal invite from the Client Portal Users page.
  How-to Delete a client Remove a client from normal Clients lists with typed DELETE confirmation. Delete one client from the record page or several from the Clients list.
  Concept Core Concepts Learn the AgencyTitan product model: workspace, clients, tasks, tickets, escalations, chat, SOPs, training, views, automations, programs, and settings.